An average freestanding bathtub is around 80-100 gallons, and the water can take a lot of time to get flushed if there is no vent! Therefore, venting a bathtub is a very common and beneficial practice that most homeowners make sure to do.
How to vent a freestanding tub? To vent a tub, you need to connect the tub’s drain with the main drain line and vent pipe using a T-joint. The air pressure from the vent line combines with the gravitational pull of the drain line and helps flush the tub’s water quickly.
Below in this article, you’ll find a detailed guide to vent a freestanding tub properly. Also, I’ve listed some common problems people face with vented tubs and their most effective solutions.
Let’s get started.
What Is a Bathtub Vent?
A bathtub vent is exactly what you are thinking right now! It’s an essential component in the main drain that helps the drain function effectively by controlling the air pressure in the pipelines.
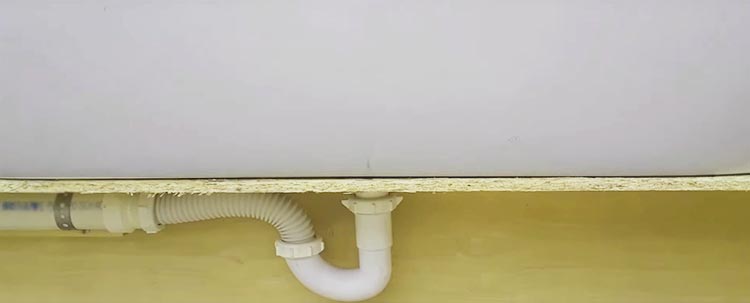
A bathtub vent has a typical U shape, for enhanced effectiveness. One end of the vent is connected to the main drain. And the other end of the vent is either around the roof or some other area of the house so that it traps air and pushes it inside the pipes for better drainage.
Why do Bathtubs Need a Vent?
Does a tub need to be vented? Or is it just an unnecessary gimmick? Well, venting a bathtub is important to ensure the tub empties quickly and the pipes do not block.
Alone, water can take a lot of time to empty because the only force that acts, in this case, is gravitational pull.
When you vent a bathtub, the drains get pressure from the venting line, and it creates a downward pulling force that pulls the water from the bathtub and empties it quickly.
Not having a vent can lead the water stand for more time, which can result in a bad smell inside the bathroom. Moreover, there are higher chances of blockages, and the drain will not work properly.
What is a P-trap?
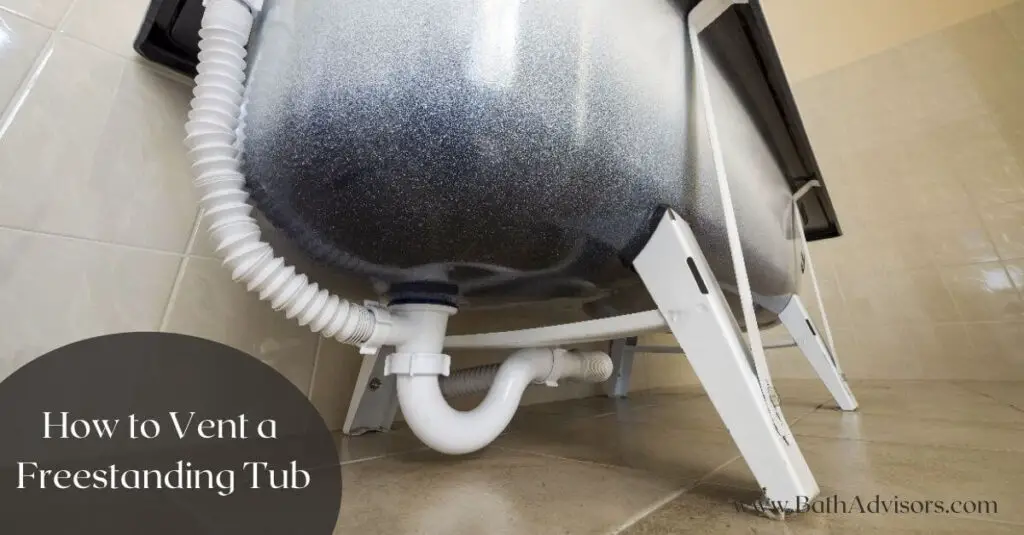
A P-trap is a type of plumbing fixture that is typically used in drains. It is designed to hold water in the “P” shaped portion of the trap, which prevents sewer gases from entering the home through the drain. Many bathtubs come with a P-trap already installed, but some do not.
The purpose of a P-trap is to keep sewer gas from coming into the house through the drains and to keep small objects from going down the drain and getting lost in the sewer system.
How to Vent a Freestanding Tub – Step by Step
Under the pan floor of the bathtub, you’ll find the main drain and the vent pipe. So, you don’t have to indulge in any major plumbing for venting a freestanding tub.
Follow the below-mentioned steps, and always have the plumbing map of your house handy to avoid touching pipes that are not necessary for venting.
Step 1: Prepare the Area and Gather all Tools
Clear the area around the drain so that there is enough room for you to install the P-trap and the backflow prevention device. Once done, gather all the necessary tools, and get the job done. Here’s what you need:
- A T-joint
- A P-trap for bathtub
- A backflow prevention device
- Plumber’s tape and silicone
- A cutter
- An adjustable wrench
Step 2: Disconnect the Tub’s Drain from the Main Drain
Before you start, make sure to empty the bathtub and close the shutoff valve that connects to the bathroom. Now get back under the bathtub’s pan floor, and disconnect the tub’s drain from the main drain.
Use an adjustable wrench to disconnect the pipes, and be ready to get drenched as the water standing inside the drain might flow back.
If the bathtub’s drain is connected with a P-trap, disconnect the P-trap from the main drain line using a wrench.
Note: When you disconnect the pipes, inspect the main drain using a flashlight and look for any signs of damages or some blockage.
Step 3: Connect a Backflow Prevention Device with the Vent Pipe and a P-trap with the Tub’s Drain
Get the T-joint handy and connect a backflow prevention device with it. A lot of homeowners do not use a backflow prevention device thinking that it serves the same purpose as the P-trap.
But it is absolutely necessary if you want to avoid any smell inside the bathroom after venting the bathtub. Secure the connection using silicone, and connect it with the main drain line.

If you do not have a P-trap attached to the bathtub’s drain, install one, and then connect the P-trap with the backflow prevention device.
A T-joint has three ends, one end should be connected to the tub’s drain using a P-trap, one end should connect to the main drain, and one end should connect to the vent using a backflow prevention device.
Step 4: Seal the Connections
Once you are done with the connections, apply silicone sealant to leave no room for leaks. When you vent a freestanding tub, you enhance the pressure inside the pipelines. Even a small hole can lead to a major leakage, and repairing that will be a daunting task.
Always use plumber’s tape when connecting the pipelines, and apply silicone on the top to secure the connections.
Step 5: Test the Installation
Let the silicone dry for some time, and you are ready to test the installation. Open the main shutoff valve, and fill a few gallons in the freestanding bathtub. Now open the drain’s plug and you’ll see the water getting flushed properly. Make sure to look under the bathtub for signs of any leaks or spills.
Common Freestanding Bathtub Vent Issues and Solutions
Venting a freestanding bathtub doesn’t mean you can bid goodbye to drain issues. There are still some drain-related issues that you’ll face from time to time.
Below, I’ve listed some common problems and quick solutions to get rid of them.
1. Water Doesn’t Flush Properly
The strong suction of drainage after venting the tub leads to sucking the soap scum as well, and it can sometimes pass the P-trap as well. If you encounter any blockages and see the water draining slowly, it could be a sign of blockage.
Solution:
Take some water in a pan and heat it, now mix two tablespoons of baking powder in it, and pour the mix in the tub’s drain. Wait for some time, and the blockage will clear automatically.
If the issue still persists, read these quick ways to unclog a bathtub drain with standing water.
2. Gurgling Noises While Flushing
Those gurgling noises while flushing is the sound of the air. It could be due to any leak inside the drain line or the vent line.
Solution:
Finding the root cause of gurgling noises isn’t easy, so get the entire plumbing structure around the bathroom inspected by professionals.
3. Smelly Drains
Even if the blockage clears, there may be a smell inside the bathroom due to the debris accumulated inside the P-trap. While the backflow prevention helps eliminate the vent line from causing odor, the P-trap still causes it erratically.
Solution:
Invest in a good drain refresher like BioFresh – Enzyme Drain Cleaner & Odor Eliminator and pour it in the drain to get rid of smells.
FAQs
Q1: Can a Shower and Tub Share a Vent?
A1: Yes, a shower and a tub can share a vent because the vent line around the bathroom is common for all drains. The plumbing fixture, however, may get complex if you connect it with several drains.
I would recommend calling a plumber if you want to get every drain vented for effective drainage.
Q2: Does a Bathtub need a P-trap for Venting?
A2: You can vent a bathtub without a P-trap, but I am not in favor of that. Installing a P-trap curtails the chances of blocks. The hair, soap scum, and debris settle down inside the P-trap, and the drainage works properly.
Also, a P-trap prevents the drain from smelling, so it’s a must when venting a freestanding bathtub.
Q3: Can a Bathtub be Wet Vented?
A3: A wet vent is a common pipeline that serves as a drain and a vent. Some cities in the United States don’t allow wet vents in homes. It is essential to go through the plumbing code of your area to know if you can wet vent the bathtub.
Q4: What if I don’t Vent the Freestanding Bathtub?
A4: If you don’t vent the bathtub, you’ll experience frequent blockages, and the drainage will also not work that effectively. Venting is necessary, especially if the tub is on the ground floor or basement because the gravitational force isn’t very strong in such cases.
Q5: Does the Vent go Before P-trap or After it?
A5: The P-trap goes before the vent as you install it with the bathtub drain. The water that the P-trap filters then goes to the mainline that carries air pressure created by the vent.
Q6: How do you Install a P-trap?
A6: Most bathtub drains come with a p-trap already installed, but if yours doesn’t, you’ll need to install one. The P-trap is a U-shaped fitting that prevents sewer gases from escaping into your bathroom and also catches any hair or debris that goes down the drain.
Installing a P-trap is relatively simple and can be done in a few steps:
1. Remove the old drain: Unscrew the drain cover and remove any plugs or stoppers. Use pliers to unscrew the P-trap from the drainpipe.
2. Install the new P-trap: Slide the new P-trap onto the drainpipe and screw it into place.
3. Reconnect the drainage: Place the drain cover back on and screw it into place. For a pop-up drain, reconnect the linkage from the overflow pipe to the pop-up lever.
4. Test for leaks: Run some water down the drain to make sure there are no leaks.
Final Thoughts
Now you know how to vent a freestanding bathtub, you can vent yours and say goodbye to most of the drainage-related issues. No matter which type of tub you own, venting is important to keep the drain fully functional.
However, make sure to vent the bathtub properly based on the plumbing codes of your state. If you are in doubt, it would be great to contact a professional plumber to know more about venting.


