If you have a modern bathtub, be it a freestanding tub or something else, caulking is essential. It’s necessary to seal the grout lines between your wall and tub.
If you caulk around a freestanding tub, it will prevent mildew, minimize leaking and do a lot more for your bathtubs to keep them in mint condition. In fact, it’s one of the easiest ways of securing a freestanding tub.

Without caulking, there might be a water puddle on the floor beneath your tub. If not addressed beforehand, this water will seep under your tub and cause bigger issues.
However, if you are concerned about it, I have talked in-depth about caulking in this piece.
Should You Caulk Around a Freestanding Tub?
Caulking is used for multiple purposes and has many advantages. But should we caulk around a freestanding tub as well?
I know many people who often use caulking on their freestanding tubs. It is usually done when they start to notice mold or mildew on the tiles and floor around the bathtub or if there are water stains around.
These signs often show the damages caused by water leakage, and you need to fix it. One way of doing that is by caulking.
Of course, if you are considering this option, you need to know about the whole process in detail.
Benefits of Caulking
1. Watertight Sealing
If your tub faucet has water flowing from it, you can caulk it to prevent water leaks. Caulking seals the cracks and crevices well, thereby saving you from costly repair. If you are not caulking around your tub, you might run the risk of damaging the floor and walls.
2. Protection Against Elements
Even though your bathtub is indoors without caulking, dirt and gunk might enter the cracks between the bathtub and the floor. Over time, the dirt not only affects the aesthetics of the bathroom but might also result in floor damage. Besides, water stains might also appear on the walls.
3. Protection Against Insects
The bathroom (being wet and damp) can attract many insects if not maintained well, and without proper caulking around your tub, these creepy crawlers have more cracks and crevices to hide in.
By sealing the area around the tub, you can lengthen its life and create an aesthetically sound bathroom. Overall, caulking helps one against erosion.
Indeed caulking has multiple advantages; however, it is not without disadvantages.
Disadvantages of Caulking
1. It is not Temperature Resistant
A bathroom in general and the bathtub, in particular, will always be damp and moist, which affects the effectiveness of caulk as if it starts to peel off. Of course, a peeling caulk does not look good and fails to protect the cracks and crevices around the tub.
Besides, owing to the dampness, there might be mold on the caulk, resulting in further deterioration. Unfortunately, these problems keep recurring even when you redo caulking.
2. It’s not Chemical Resistant
Caulk reacts with certain chemicals. For instance, if you caulk around your bathtub, you cannot use heavy-duty cleaners. Such cleaners will cause caulk to re-emulsify or lose its bond, leading to mold growth.
3. Not Aesthetically Pleasing
If you want your bathtub to look nice, caulking may not be ideal for you. Caulk is primarily bulky and does not look very sleek. Thankfully, a few alternatives are more potent than caulk and less bulky.
How to Caulk Around a Freestanding Tub
Though caulking is a simple process, you require some amount of caution to get the job done right. With a little patience and some time on your hand, you can improve the sealing or install a new one around your tub. Follow the steps below to learn how to caulk around a freestanding tub.
Tools and Materials Required to Caulk Around a Freestanding Tub
Even before you begin the caulking process, you will need to keep a few things handy so as to complete the process smoothly. These include:
- A caulk gun
- Rags
- Razor scraper
- Oscillating tool
- Utility knife
- Putty knife
- Caulk remover (if you are recaulking)
- Masking tape
- Paper towels
- Mineral spirits
- Caulk with mold and mildew protection
How to Remove Old Caulk From a Freestanding Tub?
If you have caulked around your tub before, you need to remove that to re-apply a fresh layer of caulk. The following steps will help you guide through the process.
1. Apply Chemical Caulk Remover
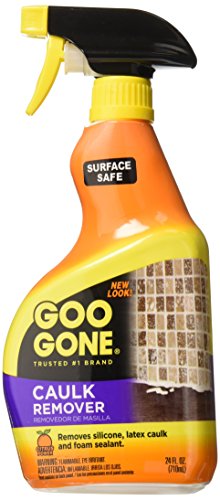
Spray any chemical caulk remover on the old layer of caulk that you have and cover it completely.
2. Allow it to Soften
Let the chemical sit on the caulk for some time. Follow the manufacturer’s instructions during this stage to determine the resting time of the chemical. Some users opine leaving the chemical overnight has the most effective results.
3. Scrape Away Caulk
The following day, use a utility or putty knife to scrape away the old caulk.
Note: Try to peel it in strips as you scrape.
Once you are done, inspect the area properly and remove any remaining caulk with any other tool.
4. Clean the Area
Clean the caulked area thoroughly with a cloth moistened with rubbing alcohol. Let the surface dry, and then re-apply the caulk.
How to Recaulk Around a Bathtub – Step By Step
Once the previous steps are done, you can use the following steps to caulk around your tub:
1. Prepare the Area
Before you apply the caulk, make sure the workspace is free of any dirt or debris and that it’s absolutely dry. Now apply two strips of painter tapes parallel to the seam that needs caulking. Again, this is only a DIY technique to get a straight line.
2. Prepare the Gun

Next, you need to put the caulking material in the caulking gun. Once you have the gun loaded, cut its tip at a 45-degree angle. Ensure the tub is firmly in place and the top is secured in the right place.
3. Smooth out the Caulk
Apply the caulk into the seam and smooth it out using the applicator. Try to create a straight line at a 45-degree angle. This angle helps to dry the sealant quickly even if it’s exposed to water and makes it last longer.
It’s not advisable to use your fingers to smooth out the caulk as it will leave concave shapes and take longer to dry.
4. Remove the Tape
After you have smoothed out the caulk, peel the tape and wait for the caulk to dry.
5. Clean off the Excess Caulk
Use a wet rag and wipe the area with excess caulk on it.
6. Painting the Bathtub

If you are concerned about the aesthetics of the bathtub, use a latex or oil-based paint two hours after applying the caulk. Let the paint sit for 48 hours before using.
Alternatives to Caulking Around the Freestanding Bathtub
As mentioned earlier, caulking has a few disadvantages. So, to counter that we have a few alternatives to caulking around the bathtub as well which you may try.
1. Spray Foam
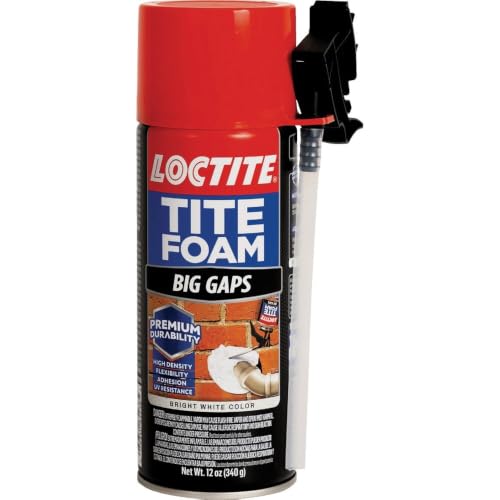
Not only is spray foam a fantastic insulator, but you can use this as a replacement for caulk as well. Unlike caulk, spray foam is waterproof, making it ideal for use around the bathtub and sink.
Even as an insulator, expanding foam is spot on. However, while using it as a caulk replacement, you must understand how far it will extend once the product is sprayed.
2. Peel-and-stick Trim
This is very similar to sealant tape. The best part about Peel-and-stick trim tape is that it comes in a wide variety of color options and styles, and thus you can use it in a wide variety of places that require sealing. All you need to do is directly apply it to the seam you want to seal.
3. Epoxy Resin
This is an all-rounder sealant that you can use to seal anything around the house. Besides its incredible adhesive power, epoxy sealer can form a watertight seal on the things it bonds on, making it a fantastic alternative to caulking.
Unlike caulk, Epoxy resin has a smooth and shiny finish. In addition, its waterproofing ability makes it an ideal choice to be used around bathtubs.
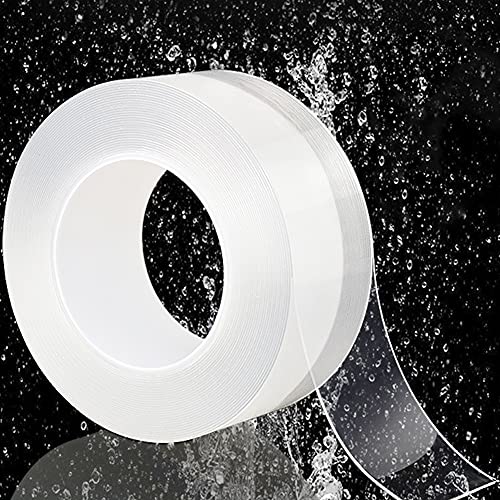
4. Sealant Tape
Sealant tape is a fantastic caulking alternative around a bathtub. Multiple varieties are available in various hardware stores, and the application methods are very easy.
Furthermore, this option is aesthetically advantageous as sealant tapes come in most common bathroom tile colors. Besides, it sticks to porcelain, stone, tiles, cement, and many other surfaces.
FAQs
Q1: What are the Best Sealants for Caulking Bathtubs?

A1: Gorilla silicone sealant caulk is ideal for heavy-duty sealing jobs. Many users have used this sealant to work around their bathtub with satisfying results. This caulk is potent, waterproof, and rot-resistant and thus can hold firm in wet bathroom conditions, especially around a bathtub.
Q2: How Long should the Bathtub Dry Before Caulking?
A2: Ideally, it should remain dry for 24 hours before you can start caulking. However, if it’s not possible to wait for that long, waiting for 12 hours also works. However, the area must be completely dried before the caulking process begins.
Q3: How Long should you Wait After Caulking a Tub?
A3: Once the caulking process is complete, you will have to wait for 30 minutes for the caulk to settle/dry before you can use the shower. Following that, the caulk will require 24 hours to get fully cured. Avoid touching the caulk during this period.
Q4: Do I need to Fill the Tub with Water Before Caulking?
A4: Caulk is relatively elastic in nature, but it can handle itself in a much better manner under compression than tension. If you fill the tub with water before caulking then the gap in between will be expanded.
Once the application is made and the water is drained, the caulk gets compressed. Of course, you can use it normally too (without filling the bathtub), but the caulk will not be in tension.
Q5: How do you Caulk a Large Gap Around a Bathtub?
A5: To start the process, measure the gap that needs filling. If the gap is up to ¼ inch, you can use a single bead of caulk to fill in the gaps. Ideally, go for a neutral color caulk or one that matches your tile.
However, if the gap is larger, you will need a bead of caulk deeper than the gap itself. However, do not flush the surface. Make sure the wall is dry and clean before applying the caulk in both processes.
Q6: Is Caulk Tape Waterproof, and what is the Best Caulk Tape for Bathtub?
A6: Most caulks are made from latex, rubber, and flexible polymer, making caulks materials completely waterproof. TYLife Self-adhesive Caulk Tape is one of the top caulk tapes you can use around your bathtub.
Made from highly durable PVC material, this caulk tape is waterproof, making it an ideal choice to caulk around your bathtub.
Q7: How often should you Recaulk a Bathtub?
A7: The caulk around your tub should last for five years at least. However, you may need to recaulk if cracks appear on the existing caulk, which may happen even before five years.
Additionally, if your caulk becomes stained, which is often a sign of mold and mildew growth, you will have to redo it.
Final Thoughts
Caulking will protect your bathtub against water attacks. Though once you caulk around a freestanding tub, you can rest assured for five years and more, it’s advisable to monitor its condition from time to time.
Make sure there are no cracks in your caulk to keep your tub in the pink of health.
Further Reading: