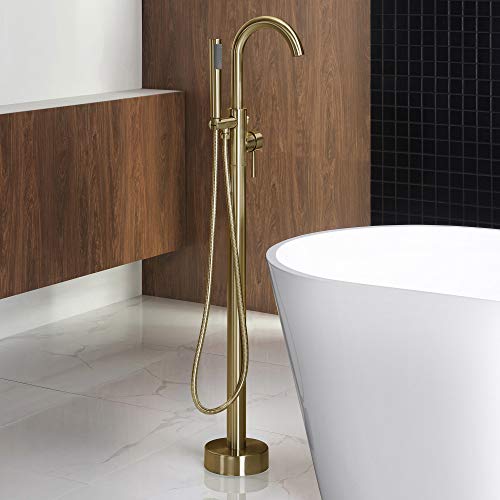
A premium freestanding tub filler can be the best addition to your bathtub! And not just the bathtub, but the faucet can spice up the look of the entire bathroom.
However, installing a freestanding faucet isn’t as easy as installing a regular tub filler. The biggest challenge most homeowners experience is getting the water lines through the concrete slab.
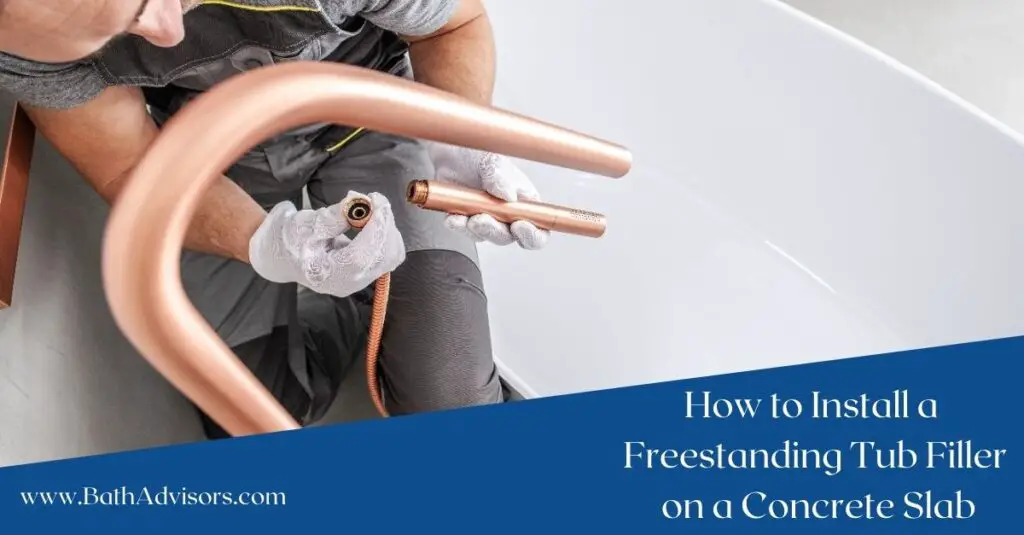
I just installed a freestanding tub filler a few months back, and this was genuinely a challenge! If you are looking for how to install a freestanding tub filler on a concrete slab. Then, this article has everything you need to know!
I have broken down the installation process into steps, so you can easily mount a faucet in your bathroom without professional help.
Things You Need to Install the Freestanding Tub Filler
Installing the freestanding tub filler requires you to have multiple plumbing tools handy. You’ll find most of these tools around the garage so get them in one place and be ready for the installation.
Here are the tools you need:
- An adjustable wrench
- Rag
- Drill (for drilling a hole in the concrete slab)
- Pencil
- Screwdriver
- Thread seal tape
- Silicone sealant
Note: Put a rag on the floor, and then place these tools over the bathroom floor. Wrenches and drilling machines can be pretty heavy, and if any of these things plummet on the floor, it may cost you some new tiles.
How to Install Freestanding Tub Filler on a Concrete Slab: Step-by-step Instructions
Installing a freestanding tub filler on a concrete slab requires precision and the right technique since concrete breaks easily if it’s hollow. So, I’ve covered every single detail you should know when putting a faucet on the floor.
Follow all steps in the hierarchy they are explained, and you can seamlessly install the freestanding tub filler on the slab.
Step 1: Assess the Area and Prepare
Start with assessing and preparing the area. If you haven’t figured out the position of the faucet, do it right away. Take a pencil or some temporary marker to highlight the area where you want to install the faucet.
Make sure the spout reaches the tub so that the water does not splash out of it. Moreover, you need to ensure that the “bather” can easily grab the handle or the handheld shower without getting out of the tub.
Once done, clear the surroundings as the debris may fly when you drill holes, and it can damage the decorative pieces inside the bathroom. I would recommend covering the bathtub as well to protect it from dust and debris.
Step 2: Look Where the Pipelines have to Go
A freestanding faucet is designed to be mounted on the floor, so you must figure out where the pipelines have to go. Unfortunately, concrete slabs usually have no space underneath, and that’s why you have to drill them or dig the particular section to put the pipelines.
Take a pencil, and draw a layout for the pipes. Start it from the main pipelines (the water connection), and end it on the faucet. Make sure to draw a straight layout since the copper tubes are straight, and do not bend a lot.
One more thing to keep in mind is to knock on the concrete slab before drawing the layout. Knocking the slab will tell you if it’s hollow or not. Also, try to avoid putting pipes under hollow slabs, as they break easily.
Step 3: Go Through the Plumbing Code and Understand the Prerequisites
Every city in the United States has a plumbing code, and you must meet its requirements. As per the plumbing code, the shutoff valve of hot as well as cold water lines shouldn’t be covered and should be accessible all the time.
There is plenty of similar information available in the code, and it varies from city to city and state to state.
Also, some cities mandate the installation to professionals, and if you belong to such areas, you need to call professional plumbers for the installation.
Step 4: Drill a Hole in the Concrete Slab
Drilling a hole in the concrete slab requires you to be gentle. I’ve come across several DIY videos that involved breaking up the concrete slab. Well, you can only break the slab if it has a strong foundation.
Also, if you want to put wide pipelines, you need to excavate the concrete slab, so there’s enough room for the copper tubes to fit.

Drill the holes at least an inch bigger than the diameter of the pipes for perfect installation. If you are looking to excavate the slab, then rent out a jackhammer and do the job.
Or get some professional help, since using a jackhammer requires a lot of strength and effort.
Step 5: Connect the Faucet’s Pipes with the Main Pipeline using Rough-in Valve
After you have drilled the holes, it’s time to connect the ½” copper tubing pipes with the main pipelines. Unscrew the pipelines from the faucet body, and slide them inside the drilled hole.
One end of the pipelines should reach the main supply line, and one should be at the faucet’s body side. If you think the stock lines are short, order bigger lines.

After the pipes reach their destination, it’s time to connect them with the main line. Use the rough-in valve for tub filler and the stabilizers over the pipelines to connect them with the main supply line, and tighten the connections using a wrench.
Use thread and seal tape to make this connection leak-proof, and apply some silicone sealant over it.
Step 6: Install the Faucet Body
Every freestanding faucet comes with a small metal stand that holds the tub filler’s body in place. Put the small stand over the drilled hole so that it accommodates the copper tubes.
Now use a screwdriver to screw it securely, and then tighten the screws. Once done, pass the tubing lines through the faucet, and connect them to the spout by following the instruction manual.
Make sure to use a thread and seal tape to reduce the risks of any leaks. Now put the faucet body over the stand, and screw it properly.
Check if the spout faces the tub before tightening the screws, and you are good to go!
Step 7: Test it Out
Now it’s time to test how the freestanding faucet works. First, rotate the handle in one direction, and check if the water properly flows through the spout.
The first few gallons of water may contain dirt since you’ve drilled holes and excavated the slab. Let the spout flow, and monitor the pressure.
Step 8: Patch the Holes
You have done a great job in installing the freestanding faucet! But the work is not over yet! Patch the drilled hole on the concrete slab that you dug out for the installation.
You can use regular cement or some plumbing putty for this task. Fill the putty or cement properly, around the faucet stand and let it dry for a few hours, before installing the flench.
Tips for Hassle-free Freestanding Tub Filler Installation
I’ve installed the freestanding tub filler myself, and I am well aware of the challenges the process throws at you. Here are a handful of tips that’ll make the installation easier and hassle-free for you.
1. Shutoff the Main Supply Line
When you are about to join the faucet’s water lines with the main connection, make sure to shut off the supply line. Or else you may get a spray of the shower. If there’s a separate shutoff valve, there’s no need to shut off the supply of the entire house.
2. Wear Protective Gear

Drilling holes on a concrete slab and excavating it leads to debris and dust flying all around. It would be great to wear protective gear, including goggles, and gloves to keep yourself safe during the installation.
3. Seal the Connections Using Plumber’s Tape and Silicone
Ensure sealing all the connections properly so that there’s no scope of leakage in the future. You can use a plumber’s tape or silicone sealant for this task. Double-check all the connections before doing the patch work.
4. Call Professionals if Required
Over time the concrete slabs get cracked, or the foundation weakens due to plenty of reasons. If this is the case in your bathroom, it will be better to leave the job to professionals.
I do not recommend excavating cracked concrete slabs, as you may end up breaking the entire slab, and getting it repaired can be a costly affair.
FAQs
Q1: How do I Stop my Tub Faucet from Dripping?
A1: There may be many reasons why the freestanding tub faucet drips. The most obvious reason is a worn-out O-ring. Replace the O-ring properly, and you can get rid of the leakage. If the faucet still drips, the cartridge can be an issue. Inspect the freestanding tub filler rough-in valve, and call the manufacturer for help.
Q2: Where does a Freestanding Tub Faucet Go?
A2: A lot of people often wonder where to place the freestanding tub filler. Well, these tub faucets mount on the floor near the bathtub. The position of the faucet depends entirely on the user’s preference. But it should be in the range of the main supply lines.
Q3: How to Fix a Moving Freestanding Tub Faucet Body?
A3: If the freestanding tub filler wobbles, it means you haven’t screwed it to the base properly. Get a screwdriver and tighten the screws so that the faucet body remains securely in place.
Sometimes the screws get free and lose their grip, so get new screws for a better fit.
Q4: What should I do if the Supply Lines Run Short?
A4: If the stock supply lines run short, and you are not able to connect them to the main supply lines, it’s time to order bigger lines. Contact your manufacturer and ask them to provide bigger supply lines. Or you can order the size that you need to complete the freestanding tub faucet installation.
Q5: How to Check the Strength of the Concrete Slab before Installing the Freestanding Tub Filler?
A5: Determining the strength of the concrete before installing the faucet is essential to ensure the slab is tough and can keep the floor-mounted faucet in place. You can do a knock test to make sure the slab is tough.
Get a small hammer, and knock the slab gently. If you hear the sound of hollow concrete, then the foundation is not that strong. You need professional help in this case.
Final Thoughts
Now you know everything about installing a freestanding tub filler on a concrete slab, I am sure you can install it properly. The one-step that needs most of your attention is drilling a hole in the concrete slab or breaking it for laying the copper tubes.
If you think the slab is weak and you cannot bore on it, it would be great to opt for professional installation assistance. Lastly, do not remove the plastic cover of the faucet while installing it, as the flying debris can leave scratches on it.


