If your bathtub’s drain isn’t doing its job perfectly, it’s time to clean or replace it. Over time, the drain’s innards erode, and it starts malfunctioning. As a result, you experience frequent blockages, or the water drains slowly.

Removing and replacing a bathtub drain is a fairly simple task, especially if you are a DIYer. Just by knowing some basic steps, you can remove the stopper and install it back in place properly.
Read this “how to remove a bathtub drain” guide and follow the steps one by one. Also, in this article, I’ll talk about bathtub drain stopper types to help you identify them and then remove them easily.
Reasons for Removing a Bathtub Drain
Why should I remove the bathtub drain? Can’t the problem be solved without removing it? Well, you can unclog a slow-draining bathtub without removing the flange, but some serious issues require removing and sometimes even replacing the drain.
Here are some reasons that removing the tub drain makes sense:
1. It Helps Clear the Blocked Drains
Sometimes the soap scum gets settled down inside the drain, and you cannot get rid of the blockage without removing the drain. Removing and cleaning the flange helps in such cases.
2. The Drain Assembly Decays or Corrodes
The minerals present in the hard water react with the drain assembly, and it erodes with time. The drain flange then reaches a stage where the only possible solution is replacing it. And to replace the drain, you must remove it first.
3. You Need a Cover with Bigger Holes
If the drain cover of your bathtub has smaller holes, the water will drain slowly, and you will frequently experience blockages. To replace the drain cover, you have to remove and replace the flange first.
Bathtub Drain Parts: Brief Overview
Understanding the bathtub drain’s anatomy will help you know more about how its parts work, and you can do the job like a PRO. A drain is much more than what’s visible inside the bathtub.
Here are some drain parts you need to know about:
1. Drain Stopper

The drain stopper is the topmost part of a drain assembly, and its purpose is to stop the water. Bathtub stoppers or covers are available in different types. And you will find information about these types in this article.
2. Drain Basket
The drain basket holds the stopper in place, and it is the drain part that helps the water flow outside the bathtub. Made using metal, the basket is highly prone to corrosion and rusting.
3. Drain Elbow
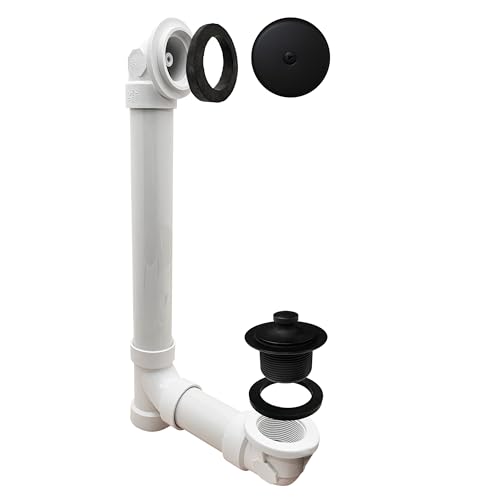
The drain elbow is right under the drain flange. In some cases, the soap scum, dust, and debris settle down inside the elbow, making the water drain slowly. You can quickly clean up the elbow after removing the drain cover and the basket.
Some other parts of the drain include the waste tee, overflow pipe, and overflow cover plate. But you have nothing to do with these parts when replacing the drain. Instead, all you need to do is remove the drain cover and then remove the basket to install new parts in place.
How to Remove Bathtub Drain
Below is a step-by-step guide to remove the bathtub drain and install a new one in place if the drain is not in good shape. The process requires you to use a handful of tools, so get them handy and get started with the job.
Tools Required to Remove a Bathtub Drain
- Pliers
- Flathead screwdriver
- Drain wrench
- Drain fitting (Drain basket and the Drain stopper)
- Plumber’s putty
- Plumber’s knife
How to Remove and Replace a Bathtub Drain – Step by Step
Step 1: Identify the Type of Drain Stopper
The first step to removing the drain is removing the stopper, and for that, you need to identify the type of stopper you are using. Here are the following drain stopper types you should know about.
Also, every type requires you to follow different steps for removing it, and I’ve listed them as well.
1. Toe-touch Drain Stopper

These are spring-loaded stoppers you can operate with your toes. Just press the stopper, and it will hop out to absorb the water.
Steps to Remove It:
- Press the stopper and bring it to the open position.
- Rotate the shaft cylinder to unscrew it. Some stoppers may require you to use a screwdriver to remove the shaft cylinder. So, check that, and remove it gently.
- Twist the drain stopper counterclockwise, and you’ll have the stopper in your hands.
2. Push-pull Stopper
The push-pull stopper is slightly like the toe-touch stopper, but it does not have a spring. There’s a big knob that’s designed to fit between your foot’s fingers. You pull it up, and the water drains, pushing it back will help you fill the bathtub.
Steps to Remove It:
- Bring the stopper to its open position.
- Lift it up and rotate counterclockwise.
- After some turns, you’ll be able to remove the stopper successfully.
3. Trip-lever Drain Stopper

These stoppers have a trip lever that’s visible outside the bathtub and helps you drain the water. If the faceplate attached to the bathtub drain has a small lever, you have a trip-lever drain stopper.
Steps to Remove It:
- Rotate the lever to bring the drain to an open position.
- Next, unscrew the faceplate using a screwdriver and remove it.
- Remove the faceplate by pulling it gently, and you’ll see the drain stopper assembly coming out with it. Pull the entire assembly out of the overflow drain.
- Wiggle the drain stopper and free it from the entire assembly. Be gentle when removing it from the faceplate.
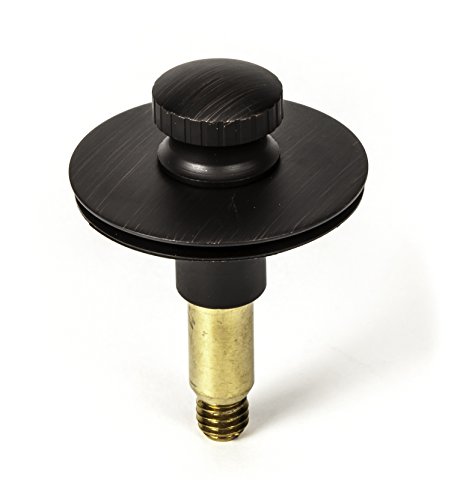
4. Lift-and-turn Drain Stopper

These stoppers have a rotating knob on the top. Although lift and turn drain stoppers appear like push-pull stoppers, you won’t be able to set them in the open position without twisting the knob.
Steps to Remove It:
- Twist the knob and set the drain stopper to the open position.
- Try to remove the cover from the knob and unscrew the assembly.
- Rotate the drain assembly anticlockwise, and you’ll be able to remove it after a few turns.
- Use pliers to pull the stopper out of the basket.
Step 2: Soften the Plumber’s Putty
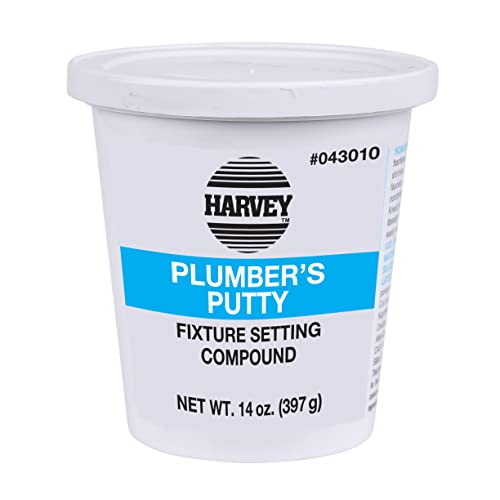
The plumber’s putty keeps the drain basket intact and prevents leaks. However, it gets hardened over time, so you need to soften it first before removing the basket.
Pour scalding water over the putty and leave it for some time. Or you can use a hairdryer to heat the putty and then remove it easily.
Step 3: Remove the Basket
Once you have scraped off the putty, you are all set to remove the basket. The basket or the flange has a metal crossbar at the bottom that stops debris from getting inside the drain elbow.
Hold the basket using pliers and insert the drain wrench or drain removal tool inside the basket. Using a wrench or bathtub drain removal tool reduces the risks of breaking the crossbars.
Turn the wrench counterclockwise in order to unscrew the basket. Make sure the pliers have a long nose to hold the basket in place while you turn it using the wrench.
Sometimes the basket may take a few turns, as some drain assemblies have more threads to keep the basket secure in place.
Step 4: Clean the Bathtub’s Drain
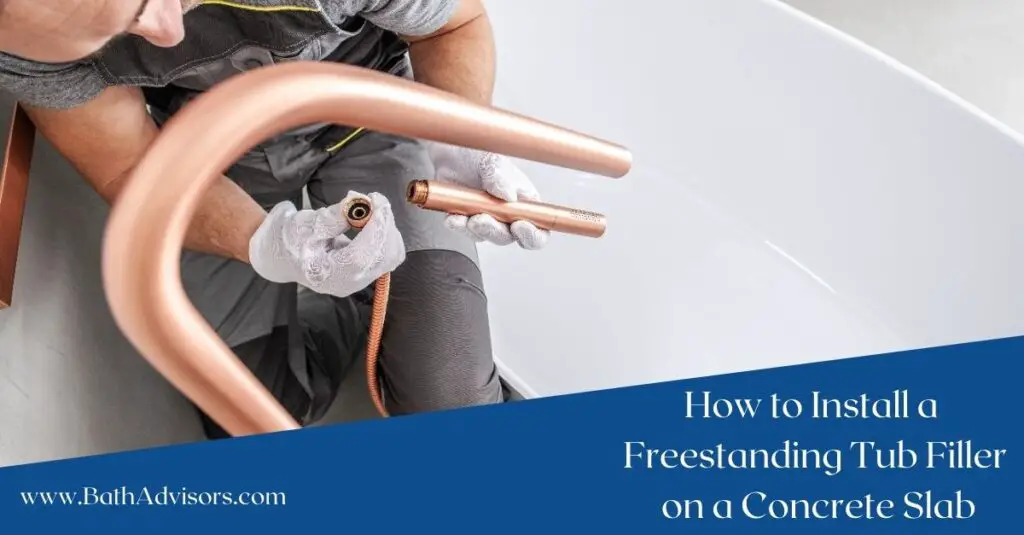
Now it’s time to clean the drain before you install it back in place. Turn on the freestanding tub filler and let some water flush out through the drain. Or, if you have a handheld shower installed around your bathtub, give the drain a powerful shower with it.
Clean the drain’s opening to remove the seal and the remaining plumber’s putty using a putty knife. If you are looking to install the existing drain stopper and basket, rinse them using alcohol.
Step 5: Put Plumbers Putty Around the Drain’s Opening
Prepare a small batch of plumbing putty and apply it around the drain. The putty will hold the basket securely while avoiding leaks. Make sure to scrape off the putty from the sides to keep your bathtub spick and span.
Step 6: Insert the Drain Basket and Install the Stopper
Grab the drain basket and insert it back in its place. Hold the basket with pliers, and then use a wrench to screw it with the drain assembly, just like you did while removing it.
Folks that are installing a flip-lever drain basket should screw the basket to the faceplate and then attach the stopper.
For other drains, all you need to do is place the stopper over the basket and turn it clockwise for a successful installation.
Step 7: Test for Leaks and Clean Up
Put the stopper to close position and fill your freestanding bathtub with water and check for any leaks. Also, clean up the putty around the basket, and you are all set.
FAQs
Q1: How do I lift a Stuck Bathtub Drain Cover?
A1: Lifting a stuck drain cover can be a challenge, as being too rough with the wrench can damage the metal crossbar. Spray some WD-40 around the rusted area, and then put the drain removal tool inside the cover. Hold the tool using a wrench, twist it gently and you can lift up the stuck drain cover.
Q2: Are all Tub Drains the same Size?
A2: No, the size of the tub drain can be different. So, it is essential to measure your bathtub drain before removing and installing a new one. Watch out for this video on how to measure the drain size.
Q3: Can you use Caulk instead of the Plumber’s Putty?
A3: Yes, you can use caulk to seal the bathtub drain basket. The silicone present in the caulk acts as an excellent sealant against water.
Q4: Does Removing and Cleaning the Bathtub Drain help Remove the Blockages?
A4: Removing the bathtub drain is actually very helpful for clearing the blockages. Moreover, it is one of the best methods to unclog a drain quickly within minutes.
Q5: How to Prevent the Water from Leaking through the Closed Drain Stopper?
A5: If the water is leaking through the stopper, maybe you have not installed it properly or haven’t used enough putty. Remove the drain stopper and install it back to get rid of the issue. If the issue persists, get a new stopper.
Final Thoughts
Now that you know everything about how to remove a bathtub drain and install it back, you can do the task whenever required. Make sure to wear protective gloves and glasses as you will be handling corroded metal parts.
Moreover, follow the steps in the order they are described and measure the tub’s drain to get the new stopper and basket assembly of the exact size.
Lastly, if you aren’t able to remove the basket because it’s not rotating, calling a plumbing guy will be the best choice.