The bathtub is one of the essential parts of your bathroom where you spend a relaxing time. Therefore, it should reflect your style, match your vibe and look aesthetic at the same time. However, we humans tend to get bored of things pretty often, and if you’re here, it means your tub surround no longer excites you as it did earlier. So you’re planning to reglaze your tub surround.
But can you paint a fiberglass tub surround?
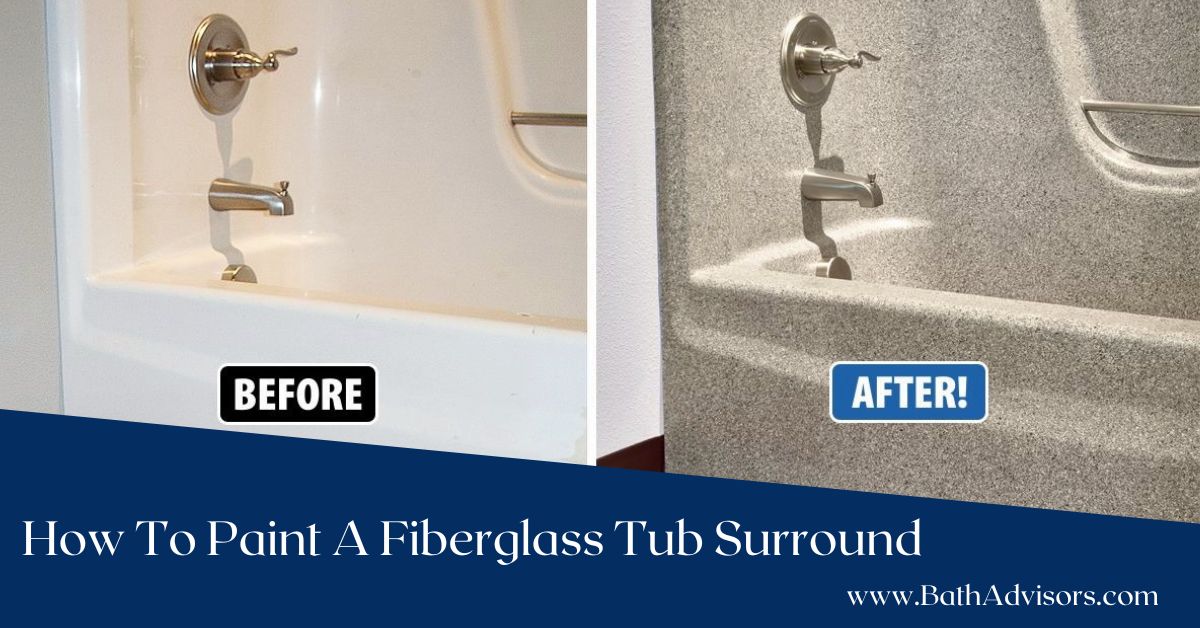
Well, the good news is you can paint a fiberglass tub surround with a fresh coat of paint. To begin the process, you must prep the surrounding following appropriate cleaning methods. After cleaning, you can start coloring with fiberglass-appropriate paint. But first, you need to apply a bonding agent or a primer formulated for plastic surfaces. The primer gives a smooth surface and better adherence to the paint.
In this article, I’ll guide you through the entire process of painting a fiberglass tub surround. Additionally, I’ll share tips for a better and long-lasting result to revamp the look of your bathtub.
So let’s get started.
What Is The Purpose Of Painting A Fiberglass Tub Surround?
The tub surround can get dull or develop cracks or chips over time due to constant water splash, soap residues, and similar factors. Hence, the main purpose of painting a fiberglass tub surround is to spruce up the overall appearance of the tub surround.
People also consider painting the tub surround after a recent renovation to match the new decor or bathroom color. But most of all, the ultimate purpose of coloring a fiberglass tub surround is to protect it from recurring damage and for easy maintenance.
Moreover, the anti-microbial properties in paint create a barrier against mold spores preventing mold growth. Mold and mildew are common in high-moisture areas like bathrooms, so paint works as a protective shield against these odds.
Do You Need To Prime Your Fiberglass Tub Surround Before Painting?
Yes, you need to prime your fiberglass tub surround before painting. A primer formulated for plastic surfaces has many benefits:
- Primer provides a smooth surface for the paint to be applied on by filling in any cracks, dents, and rough spots.
- Primer provides better adhesion to paint and reduces the chances of the paint peeling off or chipping. Moreover, primer provides better durability of the paint by protecting the surface from moisture, high humidity, etc.
- By evening out the surface, primer helps get better coverage. You can get better coverage without requiring you to apply multiple coats. Moreover, primer neutralizes the original tub surround color resulting in a more true-to-color finish.
- Primer reduces the amount of grime built up, which is a common problem in fiberglass tub surrounds.
Things You Need To Paint Your Fiberglass Tub Surround
- A fiberglass cleaner or bleach.
- Soap scum remover
- Sponge
- Fine-grit sandpaper for sanding the tub surround
- A high-quality and water-resistant primer
- Water-resistant paint
- Paint brush to apply paint and primer
- Paint roller to apply paint on flat surfaces
- Painters tape
- Paper towel
- Utility knife
- Isopropyl alcohol
- Plastic sheet
How To Paint A Fiberglass Tub Surround: Step By Step
Painting a fiberglass tub surround includes two primary steps- the first is the cleaning and priming stage and the second is the painting stage. Let’s see both processes step by step.
Stage One: Cleaning and Priming Stage
Step 1: Clean & Prepare the Surface
- Cleaning the surface is the first step in the process. You want to ensure no dirt, grime, oil, or mold potentially damages the paint.
- To clean the surface, use a fiberglass-appropriate cleaner or bleach. Mix the cleaner or bleach with water and scrub it around the tub surrounded by a sponge or cloth.
- The cleanser will get rid of any grime, dirt, mold, or mildew in the tub surround and prepare a clean surface for better paint adherence. Alternatively, you can use a soap scum remover to get rid of soap scum inside the tub.
- The next step is to lightly sand the surface using 80-grit sandpaper. Sanding evens out the glossy layers and creates a clean surface for better primer adherence.
- Remove the old caulk using a utility knife and wipe the area with isopropyl alcohol after that.
Step 2: Prime the Surface
- Before you start priming, tape all the metal parts like drain cover, fixtures, and other parts you don’t want to paint; apply tape around the tub area as well to prevent the paint from staining the floor and walls.
- Mix the primer properly using a stitch or the brush. Start applying the primer using a paint brush or roller. Try to apply the primer in one direction only so that it creates an even surface for the paint. It’s better to work in sections for a professional finish.
- Once done, give enough time to let the primer dry. You can use a stand fan or a similar ventilation process to speed up the drying process.
- We’ll go with another round of light sanding once the primer dries. The main purpose of sanding again is to clear any rough edges and smooth out the tub surround.
- Use a cloth or brush to clean off any primer scraps, and cover the bathroom floor and surrounding areas with the plastic sheet.
Stage Two: The Painting Stage
Step One: Prepare the Paint
- Mix the paint well as per package instructions. Most plastic-appropriate paints come with an activator and base; you need to mix them together. Hence, reading the instructions to know the right way of mixing the paint is essential. But there are paints that come premixed, and you just have to stir it before using.
Step Two: Apply the Paint
- Start applying the paint using a good-quality paintbrush or a roller. Start with a light coat and cover the entire tub surround. Let the first coat dry for some time before proceeding with the second coat.
The tub surround may need three to four coats, depending on how dense you want the color to show. Also, keep cleaning color drips as you see them. It’s also a great idea to clean paint spills from the surrounding areas with a paper towel slightly soaked in Isopropyl alcohol as you keep painting.
Let the paint dry completely before you use the bathtub. It may take a couple of days for the paint to dry well, so till then, don’t let the water come in contact with the tub surround. You can remove the tapes once the paint dries or immediately after painting.
You can also spray paint the tub surround with a paint sprayer specifically designed for the purpose. Spray painting needs some skills and requires consistent and sweeping motions to apply a nice and even coat of paint.
Mistakes To Avoid For Successful Painting Of The Fiberglass Tub Surround
Here are some mistakes you should avoid at all costs for a successful painting of the fiberglass tub surround-
- Not Sanding The Surface Properly: This could make your tub surround feel rough and textured, which is an indication that you didn’t clean and sand the surface well, due to which dust and debris got trapped in the paint.
- Color Fading: Color fading can occur when you don’t use the appropriate materials. Also, if the paint is mixed too thinly, fading could be an issue. Hence, using appropriate products is important.
- Not Allowing the Primer to Dry Completely: Have patience and let the primer dry completely before painting; otherwise, it may cause chipping and uneven finish.
- Painting in High Humidity: Painting in highly humid conditions can cause poor paint adhesion and slow drying. Therefore, proper ventilation is a must, and letting the color dry in between coats is essential.
- Not Following Manufacturer’s Instructions: Not following the manufacturer’s instructions regarding primer and paint is another common mistake people make.
- Using The Wrong Primer & Paint: Use only fiberglass-appropriate paints like acrylic, polyester, polyurethane, or epoxy paint for fiberglass tub surround.
FAQs
Q: How Do You Get Paint To Stick To Fiberglass?
Since fiberglass is smooth and glossy, paint adherence can be a little difficult. But by following proper preparation steps like- cleaning, sanding, and priming the fiberglass surface, you can achieve the best results.
Q: Is Bonding Agent & Primer The Same?
No, the bonding agent and primer are not the same. Primer is used to prepare a surface and is used as a base coat to improve the adhesion and look of the final paint. A bonding agent, on the other hand, is used to get paint or other coating stuck to the surface better.
Q: How Long Does A Fiberglass Tub Surround Last?
A good-quality fiberglass tub surround usually lasts for 10 to 15 years.
Q: How Much Would It Cost To Paint The Fiberglass Tub Surround?
The price varies depending on the paint type, quality, and price of other tools. But usually, the cost ranges between $300 to $1000.
Concluding Thoughts!
Painting fiberglass tub surrounds isn’t that complicated and can yield great results when you follow the right steps. I explained the steps along with other crucial information about painting the tub surround, and hopefully, you found them useful.