One of the easiest ways to improve your bathroom or kitchen’s look is upgrading the faucet. Nowadays, homeowners are considering drain upgradation as well when it comes to changing the faucet.
The first choice among the people is a pop-up drain because of the plenty of benefits it offers. Are you also looking to upgrade the existing bathroom fixture and drain?
Do you know how to install a bathroom faucet with a pop-up drain? To install a bathroom faucet with a pop-up drain, you need to remove the existing faucet and drain first. Then install the new faucet in place, attach it to the water supply lines, and then install the pop-up drain collar in the sunk hole. Put the pop-up drain in the collar, secure it, and test out the assembly.
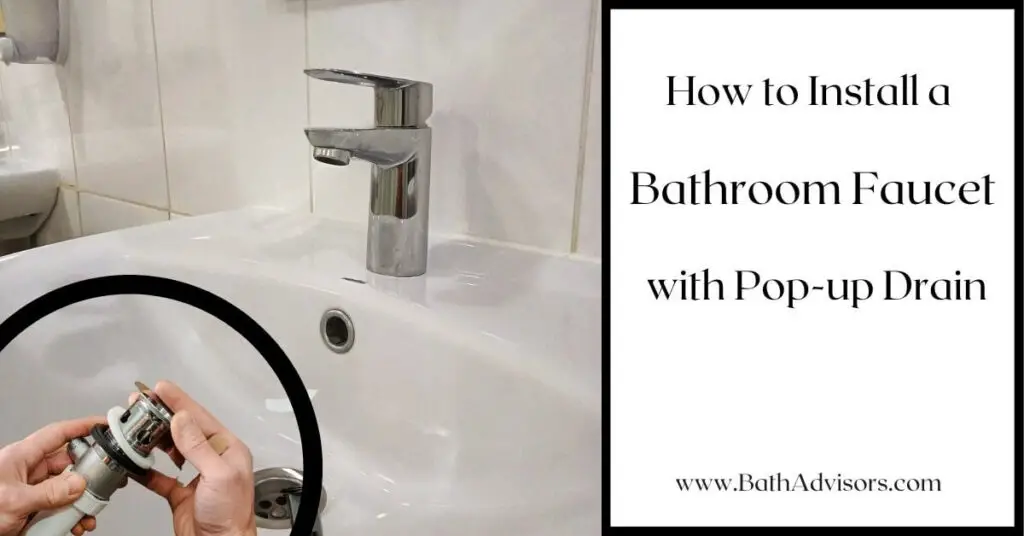
In this article, you will find a detailed process to install the faucet and the pop-up drain. Also, I’ve listed some tips to help you out.
Reasons to Install a Pop-up Drain with Your Bathroom Faucet
You might be wondering why I should get a pop-up drain bathroom sink, as there are numerous other options available as well. The reason why people are choosing pop-up drains is because of the convenience they offer.
Below I’ve listed some benefits you only get with pop-up sink drains.
1. Prevents Debris from Getting Down the Drain
Debris, when flushed down the drain, can cause several issues, including clogging, and removing the blockage can be an expensive affair. But a pop-up drain prevents any type of debris from getting in there. When you keep the drain closed, everything remains over the basin’s surface; thus, you can clean it easily.
2. Easy to Clean and Maintain
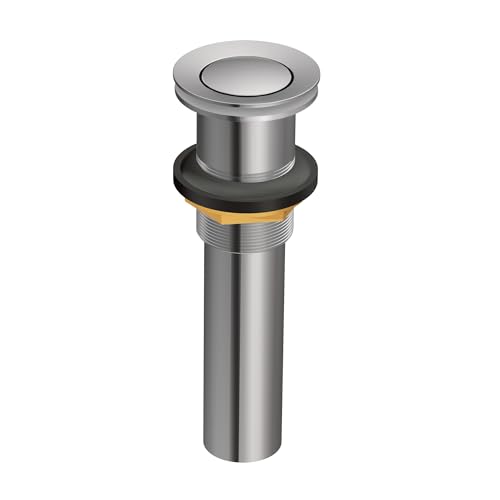
Cleaning and maintaining a pop-up drain is easy. You can quickly take the drain’s body out from the collar, rinse it, and install it back. However, make sure to get a branded pop-up drain like one from Moen or Kohler if you want it to work properly.
3. Looks Beautiful
A pop-up drain looks extremely elegant as compared to a regular drain. These drains come in different finish colors, so you can get one matching the finish of your sink faucet.
A Step-by-step Guide to Install a Faucet with a Pop-up Drain
Installing a faucet with a pop-up drain requires you to follow a series of steps. You need to install the faucet first and then install the drain to complete the installation process. Follow the below-listed steps, and you can quickly install the bathroom faucet and drain.
Step 1: Gather the Things You’ll Need
- An adjustable wrench
- Screwdriver
- Plumber’s putty
- Silicone latex caulk
- A bathroom faucet with a pop-up drain
- Old rags for cleaning
Step 2: Turn the Water Supply Off and Remove the Old Faucet
Begin with turning the water supply line off, you will find the knob under the basin. Now, detach the water supply lines from the faucet using a wrench. Be careful so that the water does not splash on you.

Empty the lines first by turning the faucet on, and then you can disconnect the lines. Once done, remove the faucet from the sink using the same wrench. Hold the faucet’s base firmly, and rotate it in the direction suggested in the instruction manual.
Step 3: Remove the Existing Drain
Now you can remove the existing drain using channel-lock pliers. If the drain is stuck in its place, you can use a crescent wrench for this task. Get under the basin, and unscrew the big nut using the wrench. When the nut comes off, you will see the rubber gasket.

Grab the gasket, and carefully take it out. Get up, and remove the drain. Use a screwdriver to scrape off the plumbing putty, and you can remove the drain cover easily.
Step 4: Clean the Work Area
After you remove the faucet and the drain cover, you’ll see some mess around. This could be due to the water splashes or plumbing putty scraps. Clean the entire sink by rinsing it gently, and then wipe it off using a soft cloth before installing the new faucet and pop-up drain.
Step 5: Install the New Faucet and attach the Water Supply Lines
Get the new faucet, and put it in the sinkhole carefully by passing the water supply lines through it. Now connect the supply lines to the main lines, and tighten the connections using an adjustable wrench.
Once done, level the faucet so that the spout gets into the center. Apply plumbing putty or silicone latex around the faucet’s base to secure it in place.
Step 6: Install the Pop-up Drain and Secure It

After installing the faucet, you can begin with installing the pop-up drain. First, install the pop-up drain collar. Put it inside the hole, and then attach the nut by getting under the sink. Tighten the big metal nut using a wrench, and ensure the drain collar does not move from its place.
Now, install the pop-up drain assembly and adjust it. This is the main part of the drain that pops up when you tap the drain cover. Put it inside the collar and rotate it to screw the pop-up drain assembly properly.
In case you feel it challenging to put the drain collar and the pop-up drain assembly, you can get some assistance from a reliable plumber.
Step 7: Test the Installation
Before you secure the pop-up drain using plumbing putty, you need to test the installation. Pop the drain and see if it works perfectly. Once you are sure about the working, apply plumbing putty around the drain cover, and let it dry for a few hours.
Clean the excessive putty using a putty knife, but make sure not to scratch the basin.
Tips to Install a Faucet with a Pop-up Drain
Installing a faucet with a pop-up drain is an easy DIY task, but there may be some issues you may experience. Here are some tips that will help you carry out the installation without any problems.
1. Use Lubricants
Removing an old faucet or drain can be a serious challenge because of corrosion. Don’t be hard when removing the faucet, and spray some WD-40 to get the grip loose.
2. Always Shutoff the Main Supply Line
It would be great to shut off the main supply line reaching your bathroom. Sometimes removing the supply lines of the faucet can damage the water lines, which can cause serious troubles if not shut off.
3. Wear Gloves
Wearing protective gloves while installing the faucet or removing it will protect your hands from any injuries. Also, it will safeguard your skin from scalding issues.
FAQs
Q1: Do I need Plumbers’ Putty for a Pop-up Drain?
Yes, you need a plumber’s putty or silicone latex to keep the drain secure in place. Not using the putty can result in leakage, and the drain collar may also move from its place. Use small amounts of putty around the drain collar and apply it using a putty knife.
Q2: How do Pop-up Sink Plugs Work?
The pop-up bathroom sink drain plugs follow a very simple working process. There is a spring-loaded mechanism inside the drain that we call a pop-up drain assembly. When you press the drain, it opens up, and pressing it again helps close it.
These drains can create a watertight seal and prevent debris such as hair and soap scum from entering inside the main drain line.
Q3: Can you Replace a Pop-up Plug with a Normal Plug?
Yes, it is possible to replace the pop-up plug with a normal plug. However, you need to have the normal plug of the same size so that it easily fits into the drain collar.
Q4: Are Pop-up Drains Durable?
The durability of a pop-up drain depends on the brand it belongs to and how you install it. Always buy good-quality pop-up drains, and install them the right way by following the correct steps.
Q5: How do I Install a Pop-up Drain Without Overflow?
Installing a pop-up drain without overflow is the easiest. All you need to do is put the drain collar in the sink and secure it using the nut. And then install the pop-up drain plug inside the collar. Rotate the plug anticlockwise, and you can secure it inside the collar properly.
Final Thoughts
Hopefully, now you know everything about installing a bathroom faucet with a pop-up drain. Be gentle to the faucet when removing and installing one. Also, use good amounts of plumbing putty but ensure it does not spread across the faucet’s base and drain.
It is essential to install a compatible faucet and drain so that it sits properly in the sink, and you can carry out the installation without any problems.

